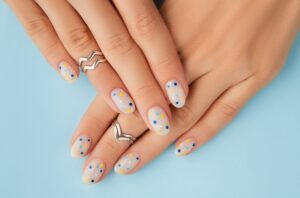
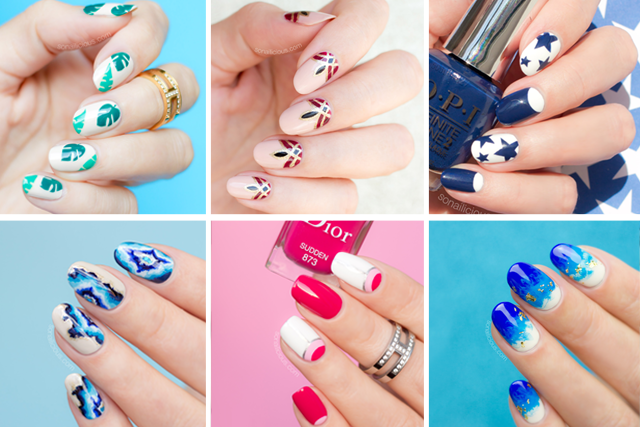
Are you tired of the same old boring nail designs? Want to add a touch of creativity and excitement to your manicure routine? Look no further! In this article, we will uncover the secrets behind creating stunning nail designs that will make jaws drop. From simple polka dots to intricate floral patterns, we have got you covered. Get ready to unleash your inner artist and transform your nails into works of art!
Gathering The Necessary Supplies
Contents
Gathering the necessary supplies is essential when it comes to achieving attractive and professional nail designs. While creativity is essential, having the right tools can make all the difference in executing your vision flawlessly. Of course, a variety of nail polishes in different colors is a must-have for any aspiring nail artist. But don’t limit yourself to just basic shades – experimenting with various finishes like matte, glitter, and metallic can take your designs to the next level.
In addition to polishes, investing in quality brushes is crucial. Different types of brushes serve different purposes: thin brushes are perfect for creating intricate designs, while dotting tools can help you achieve precise dots or swirls effortlessly. Don’t forget about striping tapes that can add an extra dimension to your nails by creating clean and straight lines in no time! Nail art stamping kits are another fantastic tool that allows you to transfer intricate patterns onto your nails quickly and easily – perfect for those who want elaborate designs without the hassle.
Finally, a reliable top coat acts as both protection and enhancement for your design. Opt for a quick-drying formula that provides long-lasting shine while preventing chipping or smudging. By gathering these essential supplies, you’ll be well-equipped to start exploring endless possibilities in expressing your creativity on your nails!
Prepping Your Nails For The Design
Before diving into the world of nail art designs, it is crucial to properly prep your nails for the ultimate canvas. Start by removing any traces of old polish with a gentle acetone-free nail polish remover to ensure a clean base. Next, shape your nails to your desired length and style using a file. It may be tempting to skip this step, but shaping your nails will help create a more polished look for your designs.
Once you have shaped them, gently push back your cuticles using a cuticle pusher or an orange stick. This will not only make your nail beds appear longer and neater but also allow for easier application of colors and designs. Additionally, be sure to thoroughly clean under the nails with a soft brush or manicure tool to remove any dirt or debris.
The final step in prepping your nails is one that many tend to overlook – moisturizing! Applying a small amount of oil or lotion around the cuticles will not only keep them hydrated but also protect against any potential damage caused by harsh chemicals used during the design process. Taking these preparatory steps will ensure that each design looks flawless and lasts longer on your beautifully prepped nails.
Choosing A Design And Practicing Techniques
When it comes to choosing a design for your nails, the possibilities are endless. From intricate patterns to minimalistic styles, there is something to suit every personality and occasion. But how do you go about selecting the perfect design? One approach is to draw inspiration from your surroundings – the color of your outfit, a favorite piece of jewelry, or even nature itself. Paying attention to trends can also help guide your decision-making process. Social media platforms like Instagram and Pinterest are great places to explore nail art designs that are currently popular and trendy. Ultimately, choose a design that reflects your individuality and makes you feel confident.
Practicing different techniques is essential in becoming skilled at doing nail designs. It allows you to experiment with various tools and materials while honing your creativity and dexterity. Start by familiarizing yourself with basic techniques such as dotting, striping, and marbling. These techniques can be easily mastered through consistent practice over time. Additionally, don’t be afraid to step outside of your comfort zone and try new methods like stamping or water marble nails – not only will this expand your repertoire of skills but it will also keep things fresh for you as an artist.

Applying The Design To Your Nails
When it comes to applying designs to your nails, the possibilities are endless. From simple patterns and geometric shapes to intricate designs and works of art, there is something for everyone. One popular trend is using nail stamps or stencils to create unique and intricate designs. These tools allow for precise application and can be easily removed or repositioned if you’re not satisfied with the result. Another method that has gained popularity is nail wraps or decals. These pre-designed stickers can instantly transform your nails into a canvas of vibrant colors and patterns.
If you prefer a more minimalist approach, consider trying negative space nail art. This technique involves leaving some areas of your nails bare, creating a striking contrast between your natural nail color and the design painted on top. Not only does it look effortlessly chic, but it also allows for better breathability for healthier nails in the long run. For those who love experimenting with different textures, incorporating 3D elements like beads, jewels, or even dried flowers onto your nails can create a stunning effect that will make them stand out from the crowd.
Ultimately, applying designs to your nails is all about self-expression and having fun with creativity. Don’t be afraid to try new techniques or mix different styles together to create something truly unique. Whether you’re going for an understated elegance or a bold statement piece, let your imagination run wild on this tiny canvas at the tips of your fingers!
Finishing Touches And Maintenance Tips
When it comes to nail designs, the finishing touches can truly take your manicure to the next level. A simple way to enhance any design is by adding some glitter or rhinestones for a touch of sparkle. These small details can make a big impact and instantly elevate your nail art. Another important step is applying a top coat to seal in your design and provide lasting durability. This will help prevent chipping and extend the life of your carefully crafted masterpiece.
In addition to the finishing touches, taking proper care of your nails is essential for maintaining their beauty. One key tip is to regularly moisturize your cuticles with oil or lotion. This not only keeps them hydrated but also promotes healthy nail growth. For those who love sporting longer nails, it’s important to file them regularly and shape them into a style that suits you best. Lastly, don’t forget about protecting your nails from damage by wearing gloves when doing household chores or using harsh chemicals.
By paying attention to these finishing touches and following maintenance tips, you’ll be able to keep your nail designs looking fresh for longer periods of time while also ensuring the health of your natural nails. So go ahead, experiment with different styles and colors, add those final touches that truly make it shine, and enjoy showing off your stunning nails!
Conclusion:
In conclusion, it’s time to show off your stunning nail designs! After following the steps and techniques outlined in this article, you have successfully transformed your nails into works of art. Now it’s time to let them shine.
Not only will these unique designs catch the attention of others, but they also serve as an expression of your individuality and creativity. Your nails are like a blank canvas that allows you to experiment with different colors, shapes, and patterns. Whether you opt for intricate floral designs or bold geometric patterns, each manicure is a reflection of your personal style.
Don’t be afraid to flaunt your nail designs wherever you go. From casual outings with friends to formal events, let your nails steal the spotlight and become a conversation starter. And remember, practice makes perfect – so keep exploring new designs and techniques to continue honing your nail art skills!
